It’s been a while!

Wow, I had really hoped to be able to keep up with the blog a bit better than I have been since I returned to my day job back in July. One thing to add to the list of resolutions for 2015!

I’ve been pretty busy over the past five months, balancing the day job with my other job; researching family trees for clients as well as sorting out orders from the Etsy shop, not to mention the general day to day life – housework and the like!

I haven’t been sewing much in these past few months, other than for custom orders – like this set of three blue kangaroo finger puppets…

Blue Kangaroos


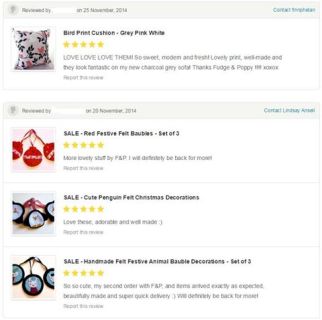
I’ve also managed to go over the 500 mark of likers on my Facebook page, had my most popular pin on Pinterest be repinned over 1100 times and been getting some lovely feedback from sales in the shop.

Feedback 3

At work we got a new boss – a great guy who already worked in the office who was promoted. I made a few things for him – firstly a Mini-Me of him (much like the others I have made for people at work that you can see in a couple of other posts here and here.)

Mini Dudley 1Mini Dudley 2

Mini Dudley 3

A mini boss complete with awesome Kokka robot fabric back, a laptop with “Very Important PMO work” on it and a tin of biscuits.

He then got his own office – and after a random conversation about cowboy films and saloons, a colleague and I decided to decorate his new office…

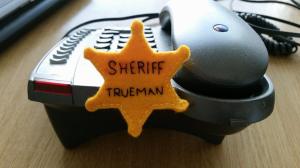
Sheriff Badge Wanted

So along with a felt sheriff’s badge and a wanted poster of me and a saloon piano, I made a cactus, a tombstone and a desk tumbleweed. Thankfully he has a great sense of humour!

I also won second prize in the poetry section of the local arts festival this year. The theme was WWI – you can read the poem on my other blog here – Dear Mrs Sage.

My husband and I have also had a few nights out going to see some shows, like The Ukulele Orchestra of Great Britain and comedian Dave Gorman and we have more planned in 2015. We also went away for a nice romantic spa weekend away at the end of October to this lovely place – Tortworth Court in Gloucestershire.

Tortworth-Court-Four-Pillars-Hotel_Exterior-1700x999

And we finally got round to developing the disposable cameras from the tables at our wedding reception over three years ago. The majority of the shots were black or white nothingness, or dark and grainy, but there were some good ones like this one…

Alex Face 2

And I got a new tattoo – something I’ve been wanting to do for some time now and finally decided on a design and booked myself in to my local tattooist (who has a three/four month waiting list!) It is based on an Alphonse Mucha painting which was modified to fit in the area I wanted it on my left arm. It took two hours and hardly hurt at all – and I love it!

Tattoomonaco-monte-carlo-1897

Then Christmas approached – with my work Christmas party which involved nice food, wine, a quiz (in which my table got disqualified in the first round…) and me laughing till I almost wet myself.

Alex Chrimbo


Sadly we lost my husband’s step-grandmother two weeks before Christmas, so we have her funeral to go to tomorrow. She was 91 and had been in hospital for about a month, so while it was not unexpected, we had hoped she would be around for one last Christmas, but sadly it was not to be. Despite this, we carried on with our Christmas preparations and had plenty of gifts under the tree. We managed to fit in a trip to my parents the weekend before Christmas and enjoyed spending some time with them. We had a quiet Christmas Day together, with Mini C being with his Mum before spending Boxing Day with us and opening his presents including a new bike. I realised that I needed to make Mini C a bigger stocking as the old one I made him was just too small, and out of the material that was left over I made a cat stocking for Sam!

Tree 2014Stockings

My best present this year has been my new sewing machine – which I got to use today making a wrist rest. It works like a dream and is soooo much better than “The Beast” my old machine. Smooth and quiet and just so nice to work with!

New MachineSpotty Wrist Rest

So there we have it – pretty much the last five months or so wrapped up! I hope that you all had a great festive season and I wish you all the best for a great 2015!

Me & My Style…

This is me –

Hello!

I suppose I have a sort of style, I like quirky prints and patterns and a perhaps unhealthy hankering for mock wrap tops and Wonder Woman related things.

I am often drawn to stripes and polka dots, purples, teals and reds and just lately mustard yellows.

To give you a bit of an idea about the sorts of things I like to wear, I’ll give you a run down of what I have been wearing today.

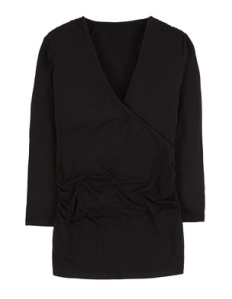
I have been sporting this rather nice simple black wrap top from Boden. I like their tops as they are long line so aren’t skimming on the waist of my trousers and me feeling like I have to constantly pull it down. The only downside is that for all their wrap tops, the wrap crosses over quite low so I stitched them all up so that they sit right on me without revealing too much of myself to the world!

Boden_BLK

Image from the Boden website

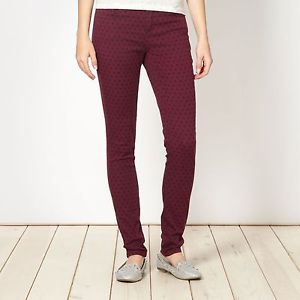
And this pair of maroon jeans with black polka dots I got in the sale from H by Henry Holland for £10.50 last month (via Debenhams). I like these because they are quite different to most trousers I have. I love the colour and they fit perfectly – and I wasn’t quite expecting that from a ‘designer’ brand. I am not a skinny stick girl so I do get annoyed at the variation between brands with sizes, so I was all prepared for sending these back or keeping them under my bed until I’d lost some weight, but nope – they were just right!

HH Jeans

Image from the Debenhams Ebay page

And a pair of these funky little mustard flats from Clarks (from the local outlet store for £19.00.) I’d been hunting down a pair of these that weren’t going to cost me a lot, I ended up getting them in the next size up from my usual size, but I wear them with inner soles, but if I was to get another pair I’d probably get them in the half size up from my usual size. They are nice and comfy and since I am having to stick to flat shoes these days after my ankle incident last year, they are great for wearing around the office and going out around town.

Image from eBay

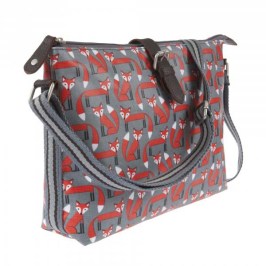
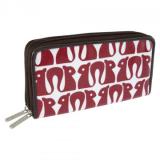
I also recently got myself a new handbag. I prefer bags that have cross-body straps as I get annoyed having short straps that hold bags just under your armpit and always keep slipping off the shoulder. This one I picked up from the Nicky James collection – the grown up offerings of Tyrrel Katz London. I love fox prints on things and this was right up my street so I just had to have it. And likewise from the same collection I have a squirrel print purse. I got complimented on it at the bank today, I often get a lot of admiring comments about it.

nicky-james-foxes-fox-cross-body-day-bag-600thumb_nicky-james-red-squirrel-purse-360

Images from the Tyrrel Katz website

My hair today was left over curls from having my hair in a loose bun overnight. Usually my hair is ramrod straight, it’s ability to hold a style is pathetic. Most attempts to curl my hair tend to fall out after about an hour or less. Of course as someone with straight hair I have always wanted curly hair. When I was younger my hair was quite thick, but these days it is a bit thinner. At the moment I am trying out the Loreal Elvive thickening shampoo and conditioner, and it seems to be working with making it look a bit more fuller without feeling too gacked up with product. As usual I was wearing my red framed glasses, (and shush – Wonder Woman underpants.)

I’m also now on the hunt for a decent pair of Wellington boots, as of this week Mr C and I have become the proud tenants of an allotment down the road from us! It’s a bit overgrown and needs some work – but looking forward to getting it up to scratch and starting to grow things! We don’t have a garden so it will be nice to have a little place to go! It is within cycling distance of our house, so once we’ve taken all our tools down there it can be a nice thing to head down there in the evenings & weekends to get our own little bit of The Good Life! Of course I am currently perusing selections of polka dot wellies…

green_spots_pair_retouch__22193.1405452786.1200.1200

Like these from http://www.jileon.com


To pin or not to pin…

logo_1

I, like many fellow crafters, have a Pinterest account and curate a few boards. I am not an avid pinner like some people. I’ve seen some boards with hundreds of pins, some pinners who have hundreds of boards with hundreds of pins… how do they find the time? I have about three public boards and one private board. The main one is the one I use to showcase items from my Etsy shop. Every time I upload a new listing I pin it to the board.

F&P Board

The other board I have is one of the first boards I started, pinning a few cute craft ideas, some I tried, others I adapted and the rest I just smile at. The third board is one called ‘My Talented Friends’. My idea was for the friends I have (and family members) who are crafty and creative that I would pin their stuff to get their work seen by more people. However as some of my friends work mainly off Facebook and not via sites like Etsy or have their own website I’ve not been able to pin as many things as I had hoped.

Friends

Initially I had pinned a few woodwork creations by an old school friend, but he seems to have now stopped selling on Etsy, which is a shame as his work was lovely and I was sorely tempted to get a lovely new chopping board from him! (Maybe I still can – I’ll just have to ask!) A while back we did a crafty swap with each other. I made him an iPad sleeve out of some thick grey felt and he did me some mdf cut outs to simulate the sizes of different techno-gadgets for me to use to make pouches and holders out of. I have been pretty lame and not actually used any of them – but do plan to at some point (before the technology becomes obsolete!) I also pinned some items from a lovely lady I met at a Christmas craft fair last year.

I also had pinned some of my favourite photographs my Dad had up for sale when he created his own Etsy shop last year. However, sadly he became discouraged after four months had passed with no interest. I was a bit sad that he hadn’t given it more of go, with more networking and marketing – considering his career background is marketing, but who knows, maybe he’ll try again one day. He is a very talented photographer and has done some great shots over the years, and specialises in candid shots, the kind when people don’t know their photograph is being taken. He has some great ones from his travels around the world during his working life: weathered faces of Japanese men, a row of elderly people on a bench taken from the back in black and white and several topless ladies which I won’t go into too much detail about…

But recently an old friend of mine who has been running a children’s clothes making business through Facebook has opened a new website – so I can eagerly pin some of her lovely items to share with people too – for those of you who love gorgeous handmade children’s clothes head on over to Vintage Verity – you won’t be disappointed!

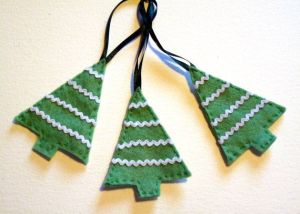
My fourth board is my secret board, the one I use to pin things that inspire me to create new items. Why do I keep it secret? I suppose so that if I did decide to make anything similar to them that people wouldn’t look from one board to the other and go ‘oooh, I see…’ I don’t know really. Is there any benefit to me pinning items from my shop to Pinterest? Does it not lead to people just potentially copying my items rather than buying anything from me? Maybe. I don’t get masses of re-pins or likes of my pins, but I do have one very popular pin that gets re-pinned or liked pretty much everyday and it is one of my most simple items – a set of felt heart decorations. I have no doubt that it is mainly re-pinned in order for people to copy it, and I’m OK with that. It is a simple thing, it’s not highly designed or very individual to me. And the item that has brought more people to my shop from Pinterest? That will be this simple set of Christmas Tree decorations. It is interesting that both of them are simple designs that I suppose are things people might want to make for themselves or get their kids to make.

Hearts Trees

Me Pinterest

As for whether I get any sales out of it, well I don’t know really. I see in my shop stats where people have been referred to my shop from, so I can see if someone has clicked on a link from my blog, or from my Facebook page or via Pinterest. Most of the time people have clicked on items that have since sold out. I don’t have enough hours in the day to curate the kinds of Pinterest boards I have seen out there. Fabulous collections of hundreds of beautiful things, but perhaps I spend more time doing and making and working than thinking and musing over stuff. Plus every time I dip into other boards on Pinterest I seem to lose whole chunks of my day, so I am too scared to do it too often in case I don’t resurface for a week. Plus there is the thing that if I pinned all the things I saw that I liked, would I ever go back to the board to look at them? What would I do with it all?

Pinterest Black Hole

Yep… (Drawn by me – you can copy it if you really want to – or pin it, whatever.)

How about you? Do you use Pinterest? What do you use it for? Are you a crafter who sells – do you think Pinterest has garnered you more sales? Please do comment and let me know!

Juggling

OK – I can’t juggle. I can just about catch one thing, let alone two or three or more. But at the moment I am sort of juggling.

Last week I went back to my old job doing project coordinating. That in itself is like juggling, assisting on several projects, working on updates to company documentation whilst problem solving the amazing timesheet system that I am a super user for. I left last year and spent the first few months just getting back on my feet, literally, after having torn several ligaments in my ankle a week or two before I left. I focused on craft fairs, on following a crafty dream whilst also running my genealogy research business Root to Tip.

And just as things were beginning to really lift off with them, I got a call. Was I available? A former colleague of mine was leaving soon and they needed someone in ASAP. I couldn’t say no, I loved working there and had been hoping I would be asked back at some point.

So I am back in my day job, seeing my old friends and even being back at my old desk. It doesn’t feel like it has been almost a year. As a consequence of this it means I won’t be ironing and sewing during the daytime, that will have to wait for evenings and weekends. As will the family tree research work – I still have work to do for two clients at the moment, so there is plenty to be getting on with.

Super Alex

Just call me SuperAlex….

This weekend just gone I worked on an order for custom cushion covers off the back of another cushion order. Last week I felt a bit busy and a bit stressed, almost every night had something doing. On Monday night my husband and I went to see the band Reel Big Fish in Bath, then Tuesday and Wednesday were busy nights for my husband, get in, get dinner, head off, then Thursday I was meeting up with a Root to Tip client at the pub in the middle of Avebury Stone Circle. So come Friday evening it was nice to just collapse and do not much.

avebury

What do you mean? A pub in the middle of an ancient stone circle? Yep – right there where the arrow is!

This week is less hectic. I am hoping to get some time to make a set of cushion covers from some delightful fabric I’ve had for a little while, but I also need to get on with some research work, find a couple of hours to natter to my Mum on the phone and also bake some cakes to take into work for my birthday…

Mmm juggling. Maybe one day I will learn how to do it!

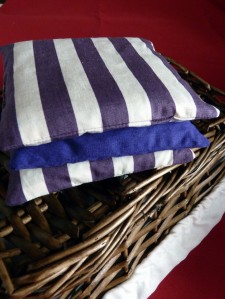
Purple Stripe Beanbags

Juggling beanbags anyone?

A bag of beans

A while ago I saw a great tutorial from Project Nursery.com via Plush Addict’s Facebook page on making a beanbag.

bean-bag-graphic-2

The instructions were very easy to follow, but despite it saying it could be made in 30 minutes, it took me a wee bit longer than that. Like maybe closer to two hours. This is probably down to the fact I had to measure out my fabric, trim it to size, iron it, lay it out on my kitchen floor, pin it up, trim it again as somehow one piece was bigger than the other before I could get on with any sewing.

I decided to go for a non-heavyweight fabric, I may end up regretting that, but I’ve been sure to make sure I secure my seams pretty well and my stepson has been advised that as it’s been lovingly made by yours truly, that it would be nice if he didn’t constantly throw himself on it.

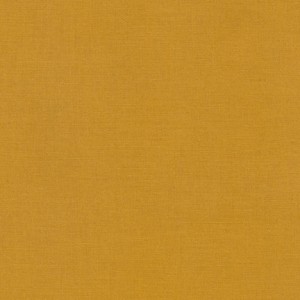
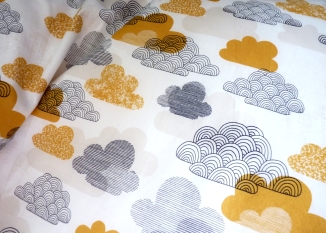
I picked Passing Clouds in Gold by Elouise Renouf for the Bark & Branch collection of Cloud 9 fabrics. I love this design with the bold black lines and the gold yellow tones. I went for a matching Kona Solid in Yarrow. I got the clouds fabric from one of my favourite online fabric shops The Eternal Maker.

CloudsYarrow

I dutifully followed the instructions, sewing up the two long sides first, folding over, cutting my curve and sewing that, and then came the bit I was a dreading. The zip. I’ve never done a zip before, ever. I’d had to look at the picture a few times to get it into my head what to do. I sent the link to the tutorial to my Mum so we could talk about it. She was all “Oh yes, it should be pretty straightforward, make sure you pin it in right sides together. Practice first with the other zip you bought a while ago.” I had bought a zip a couple of weeks ago, thinking about perhaps having a go at something with a zip. In the end I just went for it, I made sure I pinned it in, then tacked it in and took it to the machine and put my zipper foot on. Then I had no idea which way I should sew it, which side of the zip should be against what part of the foot? In the end I did a line of stitching both ways, at least it will make it a bit more secure! I also then realised how to finish it off from each side making sure none of the ends of the zip were showing on the right side of the fabric and stitched across the ends to ensure the fastener would stop and there would be no escaping beans!

The tutorial said to use 3.5 cubic feet of bean bag fill. I had bought 4 cubic feet thinking that I could top it up when required, but it turned out I needed more than that as it was looking a bit flat and sad, so I ordered another 4 cubic feet with a view to having plenty left over to use for top ups! I used probably just under half of it to finish it off.

Beanbag 1Beanbag 3Beanbag 4Beanbag 2

I am quite pleased with it, pleased I didn’t totally mess up on the zip and pleased that it looks vaguely like the picture, but most of all, pleased that my stepson likes it. When I told him I had made it he said ‘It’s very nice.’ Later that afternoon he spent several minutes jumping on it and then squirming about in it before eventually settling down and using it to sit in while playing on the XBox. Looks rather comfy!

Beanbag Customer


Printing and Stamping

This week I decided to try to make my own little stamp of my Fudge & Poppy logo using a square eraser. I picked up a bunch of five chunky black erasers from eBay a while ago with a view to giving it a go.

I had been flicking through a nice book I got from the library a while back – The Hand Printed Home by Jenny McCabe. I love the idea of making my own stamps and prints and especially doing something to print fabric with. At some point I will get some fabric paint medium to mix with acrylics to use to try some ideas with.

51tCYR8By1L._

In the meantime I thought that my first attempt at carving my own stamp would be something I could perhaps use to stamp onto brown paper tags. So I got the image for my F&P logo and reversed it using Gimp (a free version of a programme like Photoshop) and then printed it out. I then stuck it over my eraser and dug out a craft knife. I was a bit annoyed with myself, as the last time I had used the craft knife was when we did pumpkin carving last year – and it must not have been cleaned very well (and had been stood in a Marvin the Martian mug on the windowsill by the sink since then) so the end was a bit rusty. But I thought, it’s my first go, so I wont be too hard on myself if I make a hash of it.

As it turns out – I didn’t do too badly!

Stamp

I went through my old stash of ink pads to find that my black one had totally dried up and my bronze one was just about OK, so I will probably have to get a new black one if I want to use it properly.

Last week I also managed to make a nice print on myself with the iron. I was reaching over it to put a cushion cover on the end of the ironing board when I caught my wrist on the top point of the iron – which was super hot as it was on the hottest setting. Needless to say I ran straight into the bathroom and ran gallons of cold water over it. A week on and it’s still quite tender, the skin has cracked a little because I’ve been doing all my usual stuff and probably not taking quite as good care of it as I should. Hopefully smothering it with Sudocrem every hour might stop me from getting an iron shaped scar!

Burn

Burn baby burn! Iron Inferno! (Doesn’t quite have the same ring to it.)

On a slightly happier note, I did make a beanbag for the living room this week – I will do a post about it next week as I discovered it needed more beans than the tutorial said it did so I had to order some more! (Probably down to me not being able to follow simple instructions – but it still looks like a beanbag AND I did my very first ever zip so it’s all still good!)

I also discovered this week that I had reached my 100th Etsy sale, so after a bit of jumping about and smiling like a loon, I decided to put an offer on my Facebook page to say that to celebrate, the next order I got would get a free gift. And then moments later – I got order number 101! So that went off and will hopefully be received later today. I decided to keep that offer open for the rest of the weekend – so if anyone fancies a little free gift then why not pop on over!

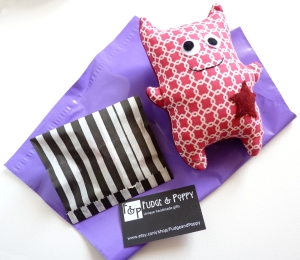
Monster Sale

Order 101 complete with mystery free gift!

Plus if you’ve never ordered anything on Etsy before – why not take advantage of this fab little offer to get £5 (or the equivalent in your currency) off your first ever order! (The minimum order value is £10 – but you could order a few little things or one bigger thing if you fancied.) You don’t have to use it in my shop, but it might be nice to get £5 off and a free gift too!

safe_image

The thrift factor

The thrift factor is not some low budget TV game show, it is more really something I do or engage in almost every day.

I suppose I’ve always been pretty thrifty. My Mum remembers me as a small child, counting out my pocket money and working out what I could afford to buy and seeing how much change I would have and making it last. We were brought up to understand the value of money, to work for what you want and how to make our money work for us.

money_2196794b

My Dad is usually pretty surprised whenever I tell him about the latest bargain or deal I have managed to get, whether it is on clothes, a new phone package or rearranging my mortgage all by myself when I was 24 lol. He often calls me a cheap date but I take it as a compliment.

While I try to save money on most things, be it groceries, a good broadband deal or books, I suppose a good example of my thriftiness was my wedding.

Now, I’m not the kind of girl who has been planning her wedding in her head since she was five. I was engaged once before and got as far as making a guest list and thinking about having dodgems at the reception, but got no further than that with any planning. I looked at some dresses in a magazine and the internet and that was about it. After 6 years of engagement I called it a day. When I met my husband we were just good friends for about 9 months before we thought about seeing whether it might work between us, and thankfully it did. We were very much on the same wavelength (and still are) and when we got engaged we already had a venue in mind – Westonbirt Arboretum. It is a lovely park filled with amazing trees and at the end of September going into October, the maple trees are in full amazing autumnal colours. We decided to go for the last day that weddings were allowed to be held there before the facility had to make way for it’s busiest time – which was the 30th September. We picked a weekday – because it was cheaper.

venue

The Great Oak Hall at Westonbirt Arboretum

web2insideWA20

An inside view!

(Shortly after our wedding, BBC’s Autumnwatch used the hall as their studio for the first week of the show.)

At that time our finances were chugging along at a semi-pathetic pace. I was contracting somewhere horrible and being treated like rubbish and struggling with insomnia and anxiety and ended up leaving. He was paying out a lot of money every month to his ex, but we had plenty in the savings account but it was going to be tough. I spent a year out of work, applying for about 15 jobs a week, having interviews and getting sick of people telling me they didn’t select me because they thought I would get bored too quickly and leave. But the wedding planning had to carry on through this time.

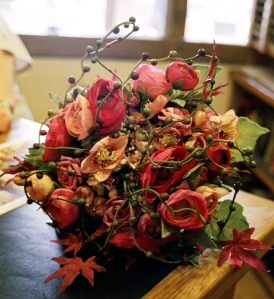
I made the most of eBay – I decided to get a dress made for me by someone on there – it was a bit nerve racking but I was pleased with the end result. It was a fraction of the cost of most wedding dresses but still looked good. I also decided to make my own bouquet, the flower girls posies and buttonholes, and an arrangement for the table in the venue. Nothing fancy, I wanted it to be pretty simple. I ordered different artificial flowers – like hellebore, ranunculus, rose, hydrangea and some foliage and incorporated autumnal maple leaves, and made my arrangements several months in advance. I also got the flower girls dresses from eBay – all Monsoon dresses. We used Quidco when making most of our purchases for anything, so we started racking up some serious money to go into the savings. From switching our energy supplier to cancelling our Sky account and starting up a new Sky+ account and getting £s in cashback, not to mention Marks & Spencer’s vouchers that we used to buy a case of champagne!

Flowers

My bouquet. The flower arrangements came home with me and are a nice reminder of the day.

We hired a village hall not far from Westonbirt for our reception and had a sort of afternoon tea themed do. It was a mixture of food I had made, food I had ordered from Waitrose (using a voucher my brother sent me for my birthday) and food my Mum and her friends had made. My Mum made our cake, her friend and a helper helped with sorting out all the food and clearing up.

Cake

Our very pretty (and yummy) cake

My Dad ended up using CDs from his car for our music when it turned out, that despite the hall custodian telling me that a music CD created by iTunes would definitely play on their sound system – they didn’t. That was the only hiccup of the day. A nice surprise was finding that my Mum had made little pots of jam and marmalade for all the guests. Not to mention knitted a quirky little set of dolls!

Jams

We got my stepson’s suit in the Debenham’s sale – and then sold it on eBay some months later when he was too big for it. My husband’s outfit came from M&S and he still wears the tie and trousers for work and the jacket for important things every now and then. We used Vistaprint for our invites that I designed and a family friend took photos for us as well as my Dad and father in law. Our rings came from eBay and glasses hire for the day was free with our Waitrose food order. In all I think it cost us around £2,500.

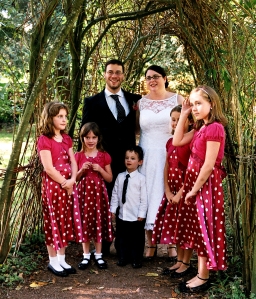
Group Shot

I’m the one in the white dress…

Our honeymoon was a few days away in a self catering cottage in the Wye Valley – which was paid for by my in-laws who all clubbed together to pay for it. And my lovely sister paid for our hotel room on our wedding night – and upgraded us to a balcony room.

glentrothy_lead_french_windows_and_table

Our gorgeous cottage

We had a lovely day, and it was nice not to feel stressed, and to not be in some sort of financial pit at the end of it all – which wouldn’t be a good way to start a marriage! I still make the most of sites like Quidco and eBay and will certainly shop around and look out for offers or voucher codes when making a large purchase.

So when I am making things I do like to think about the thrift factor. I think about making the most out of the fabric I order, how much wastage there might be and what I could make using the scraps. I am always looking for the best deal, checking out fabric prices, special offers while ensuring I am not compromising on quality. I’m not saying I’ve never made any expensive mistakes, but I learn from them and make sure I do better next time. I get books from the library instead of buying them to scour for ideas and tips and to learn a bit more about sewing. And there is always my Mum for some great free advice (which I got this morning about sewing with zips!)

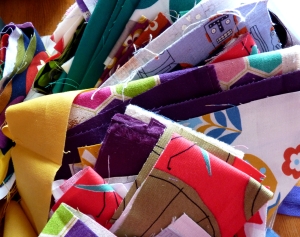
Scraps

Fabric scraps – nothing is wasted!

Are you thrifty? Do you make things instead of buy them? Did you have a DIY wedding? Care to share?

Pleased as punch!

Earlier in June I hosted a giveaway on my Facebook page and had a little blog post about it too. Dashwood Studio had a new range of fabric out in a fab fruit themed collection called Retro Orchard. I saw it and I knew that it would be the one I picked to make the cushion out of for the giveaway so snapped up two fat quarters straight away.

The giveaway was really popular – aimed at my page getting 300 likes. I’d been busy beavering away making more cushion covers before I noticed it had gone way over 300 so I decided to keep the competition open for a little while longer till that evening to give me some time to finish off my work and concentrate on compiling a list of entries and drawing a winner before Springwatch came on and I had my ‘Me and Chris Packham’ time.

A lovely winner was chosen and she is now happily enjoying cushiony things with it. Then this morning whilst having a little look at my blog stats I noticed that someone had visited my page via the Dashwood Studio blog… I curiously clicked on the link and was so pleased to see that they had been doing a little round up of blogs who had been making things using the new Retro Orchard collection and there was my cushion! So I did a little dance in my chair and have had a big grin on my face for about an hour.

Image

Why not check out the page – see some of the other lovely things people have been making! I ended up making a couple more of them which are in the shop here.

I didn’t do a vast amount of crafty stuff last week as I was busy with my other job – doing genealogy research. Today I plan to crack on with a few more bolster cushions. I have a load of fabric waiting to be transformed, and had spent a bit of time sitting with my creative consultant (aka husband) holding up crochet lace ribbon, velvet ribbon, rick rack etc up to the fabrics to get his opinion on what worked well with what. Sometimes you just need another set of eyes to take a look!

My plan to not order any more fabric for a while ended up going a bit awry when I saw that Plush Addict had a 20% off sale on Kona Solids until midnight tonight. So I picked up some more bits and pieces mainly for making up a pair of cushions where I have only just got one in stock as well as a couple of new ideas. But this is definitely the last one for a while!


Hold onto your hats – here comes a tutorial!

Say what??? Yes, me, doing a tutorial!

Yesterday I sat looking through my stash of ribbon and trim to think of what bits might go better with some fabric combinations I have for making some more rectangular bolster cushions. I’ve mainly been making a whole host of square ones lately while I was waiting for my last fabric order to arrive. (Last one for a while – sad.) Having found some great matching Kona solids to go with some bits I had that I thought would be good candidates I started on one as I knew I would be using the same colour green thread that was still in my sewing machine from having recently made another lime green cushion cover for a repeat customer.

As I started to measure the fabric out I thought to myself – Alex – you should take some photos while you go and providing it doesn’t turn into a shambles – you should do a tutorial on your blog about it. (Apart from the cat, I tend to be on my own most of the day so talking to myself is a pretty frequent occurrence.)

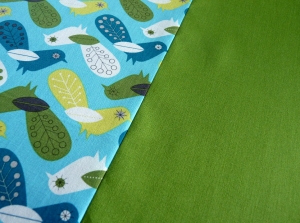
So here we go – I’ve had a fat quarter of this lovely Robert Kaufman Bermuda Birds fabric designed by Suzy Ultman as part of the Critter Community collection, for some time now. I had cut into it a few times to cut out some of the bird shapes as I made some padded keyrings out of them last year. But I found that the Kona Grass Green shade went perfectly with the green birds in the design and I knew I had plenty left over from a recent fabric order in order to make two cushions out of.

BirdsGreen

This tutorial is for making an envelope style cover to fit a 12″ x 18″ cushion pad. My pads are a bit more like 12″ x 17″ so I ended up sewing mine a little shorter at the ends so it didn’t look baggy! I made two of these at the same time so if you also want to make two – just double up on everything. Isn’t it always nice to have a matching pair?

The general rule is that if you are doing a cushion cover you want to cut out the fabric to the size of the cushion pad so that when is sewn up it is slightly smaller and therefore allows the cushion to be plump, rather than just sitting inside a pretty looking sack.

First of all measure out your fabric. For my bolster cushions I like to use a patterned fabric on one half of the front with a matching solid shade on the other half, with that same shade for the back. Depending on the pattern you choose you could decide to have more of that showing on the front or less, it’s totally up to you. As the birds pattern repeat is largish I wanted to make sure that I had a decent amount of it on the front to show it and be a feature, so I decided to allow 10 inches in length for this with some extra to allow for sewing it to the green fabric – usually about half an inch extra and 12 inches wide. And then cut out an 8 and a half inch long piece of the green for the front – 12 inches wide. For the back pieces you will need to allow for the full front measurement of the finished item (18″ long) and about 4/5inches extra to allow for the overlap closure. For mine I went with 4 inches – so in total 22″ long and 12″ wide- you will then want to cut this in half width ways.

If you are swishy you can use a cutting mat, a rotary cutter and have nice lovely straight lines. If you are like me, with a rotary cutter blade that decides to loosen every time you use it, then you might just opt to measure with tape and a ruler and mark out with tailors chalk and cut with fabric scissors!

Bird Cushion Tutorial 1

I then iron out all my pieces. I usually don’t put any water in my iron as we have really hard water here and using the steamer on it just gets it clogged with limescale and then that gets fired out all over stuff, so I have a nice thin duster that I always use – I soak it in cold water from the tap and wring it out and lay it over the fabric and give it a quick once over with the hot iron. I then take the duster off and go over with the iron again. It works a treat. I always iron both sides of my fabric – but if you are using a fabric that might not cope too well with this – then don’t!

Once ironed I pin up my hems for the back piece. I usually do half inch – fold once – iron, fold again, iron again and pin. I then also pin up my front pieces right sides facing ready to sew together. (Don’t forget that I am making two cushions here so there are four back pieces but if you are just making one then you will just have two!)

Bird Cushion Tutorial 2

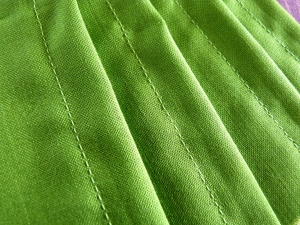
Next it is time to sew the hems for the back pieces. I usually line mine up to the 15 (5/8) mark on my sewing machine seam guide as this is the perfect width. Then I put them to one side for later.

Then I sew up my front pieces having measured and put a line onto the back of the fabric and ironed a crease down it to be sure I am following a straight line with that extra half inch. Once done I press the seam flat front and back and then I am ready to pin on the trim I have chosen ready to hand sew it on.

Bird Cushion Tutorial 5Bird Cushion Tutorial 3

I decided on this lovely pale duck egg blue colour crochet lace ribbon by Tilda and picked a pale blue thread that wouldn’t show up to delicately sew it on – making sure I did stitches along each edge and the middle at regular intervals to make sure there were no bits that were unsecured and could get caught on things. I sat and watched some TV while I did this. You may choose to continue to sit at your designated sewing table, you may wish to do it sitting in bed. You might wish you hadn’t started but once it is done you will be pleased.

Bird Cushion Tutorial 4

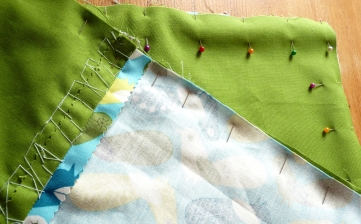
So now that the front and back pieces have been all sewn up ready, it is time to pin them together right sides facing. I tend to check the hems of my back pieces to see which one looks the neatest and lay the best one down first as this will be the one you will see when it is finished.

Bird Cushion Tutorial 6

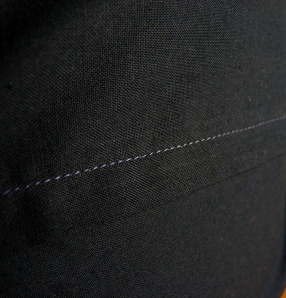
I then sew all the way round with a straight stitch – make sure the stitch length isn’t too small or your fabric will pucker, too long and you might get gaps in your seam which nobody wants. Make sure you backstitch at the end to keep the seam secure. I often go for the seam allowance measurement 20 (8/8) or 15 (5/8) on my sewing machine guide, for this one I went with 15. Once the seam is sewn I then do a zig-zag stitch down each edge stopping just short of the corners, securing each end with some straight stitch backstitch. This is to strengthen the seam, it is called serging. If you have a nice fancy machine like an overlocker you can overlock the edge, but if you are like me and don’t have all mod cons, then a zig-zag is fine. I then use pinking shears to trim the corners off – make sure you don’t cut through your stitches or you will be swearing and probably crying (if by some chance you do this, then you will need to re-sew.) Then trim away the excess fabric with the pinking shears to further protect the fabric as pinked edges fray less.

Bird Cushion Tutorial 7

Next the iron comes out again and I press it all while it is still inside out, and then turn it the right way out making sure I poke the corners out well so they look properly pointy and iron again. You will no doubt get bits of fabric fluff all over the place from the trimmed edges so use a good lint roller to get it off and voilà! You’re done – ready to put your cushion pad in and start doing cushion type things with it!

Bird Cushion Tutorial 8

I do enjoy it when it’s all done and I see the finished article, I like it when I know I’ve picked some good combinations of patterns, solids and embellishments and it all comes together to be something rather nice! So why not give it a go!

So the end result is now in my Etsy shop here.  (Both of them.)

Bermuda Bird Cushion 4

Sweet Treats and Robots

Last week, after having had a bit of a cushion making marathon I decided that it had been too long since I had last made a cake. In order to rectify this I whipped up a nice quick lime drizzle cake.

Nice and moist (especially after having been liberally drizzled in the lovely lime syrup) it is quite a nice light summery type of cake.

The recipe I used was:

Pre-heat oven to 180C (Fan 160) – grease and line a rectangular (or in my case grease a square silicone) baking tray

175g self raising flour

175g golden caster sugar

1 teaspoon baking powder

Zest of two limes

2 eggs

6 tablespoons milk

100g soft unsalted butter

Mix together all the ingredients and beat until it is a smooth dropping consistency. Pour into the baking tray and smooth the top. Put in the oven for 30 – 40 minutes until it is golden and firm to the touch.

Mix together a further 100g of caster sugar with the juice from the two limes (and any other zest you can get off them) and drizzle liberally and evenly over the still hot cake. Once cool, cut up and it will keep for a few days in an airtight container, or just put into your facehole immediately.

Now – about those robots…

One of the awesome cushions I made last week using a great design from Kokka. They have a nice blue/grey background and I teamed this one up with a nice dark indigo on the back.

Grey Robots 1Grey Robots 5

Available in the shop here.

I also had another custom order for a coordinating cushion to go with the owl cushions I sold a while back – this lovely customer had previously bought two cushion covers and had asked for three plain green ones to match – two small darker green and one larger lime green. She decided last week that she wanted one more large lime green one. It is always nice to get repeat custom, it certainly helps with boosting confidence in my abilities!

Danielle Lime Cushion Cover

Although last week was a bit stressful as I ended up blowing a 6th bulb on my sewing machine in the space of just over a month. That last one lasted all of about half an hour after having replaced the 5th one that burnt out, then as I turned the dial to switch from straight stitch to a zig-zag stitch for some serging (without having a posh overlocker machine) – pow – it went. Not burnt out this time, the tiny filament had broken on one side, so was presumably just very fragile and sensitive to vibration. So after a phone call to my Dad, an ex-engineer we’ve concluded that I need to do two things – 1. get a surge protector to use with my machine and 2. try an LED bulb. So just need to find a good reputable seller that isn’t too expensive and get me an LED bulb – he steered me clear of eBay where I have bought my replacement bulbs recently, just because you never know about the quality of electrical type products on there. So fingers crossed that this is the end of me sewing in the dark!