Say what??? Yes, me, doing a tutorial!
Yesterday I sat looking through my stash of ribbon and trim to think of what bits might go better with some fabric combinations I have for making some more rectangular bolster cushions. I’ve mainly been making a whole host of square ones lately while I was waiting for my last fabric order to arrive. (Last one for a while – sad.) Having found some great matching Kona solids to go with some bits I had that I thought would be good candidates I started on one as I knew I would be using the same colour green thread that was still in my sewing machine from having recently made another lime green cushion cover for a repeat customer.
As I started to measure the fabric out I thought to myself – Alex – you should take some photos while you go and providing it doesn’t turn into a shambles – you should do a tutorial on your blog about it. (Apart from the cat, I tend to be on my own most of the day so talking to myself is a pretty frequent occurrence.)
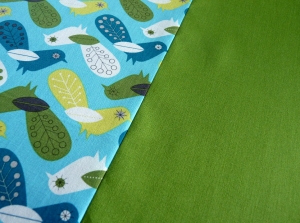
So here we go – I’ve had a fat quarter of this lovely Robert Kaufman Bermuda Birds fabric designed by Suzy Ultman as part of the Critter Community collection, for some time now. I had cut into it a few times to cut out some of the bird shapes as I made some padded keyrings out of them last year. But I found that the Kona Grass Green shade went perfectly with the green birds in the design and I knew I had plenty left over from a recent fabric order in order to make two cushions out of.


This tutorial is for making an envelope style cover to fit a 12″ x 18″ cushion pad. My pads are a bit more like 12″ x 17″ so I ended up sewing mine a little shorter at the ends so it didn’t look baggy! I made two of these at the same time so if you also want to make two – just double up on everything. Isn’t it always nice to have a matching pair?
The general rule is that if you are doing a cushion cover you want to cut out the fabric to the size of the cushion pad so that when is sewn up it is slightly smaller and therefore allows the cushion to be plump, rather than just sitting inside a pretty looking sack.
First of all measure out your fabric. For my bolster cushions I like to use a patterned fabric on one half of the front with a matching solid shade on the other half, with that same shade for the back. Depending on the pattern you choose you could decide to have more of that showing on the front or less, it’s totally up to you. As the birds pattern repeat is largish I wanted to make sure that I had a decent amount of it on the front to show it and be a feature, so I decided to allow 10 inches in length for this with some extra to allow for sewing it to the green fabric – usually about half an inch extra and 12 inches wide. And then cut out an 8 and a half inch long piece of the green for the front – 12 inches wide. For the back pieces you will need to allow for the full front measurement of the finished item (18″ long) and about 4/5inches extra to allow for the overlap closure. For mine I went with 4 inches – so in total 22″ long and 12″ wide- you will then want to cut this in half width ways.
If you are swishy you can use a cutting mat, a rotary cutter and have nice lovely straight lines. If you are like me, with a rotary cutter blade that decides to loosen every time you use it, then you might just opt to measure with tape and a ruler and mark out with tailors chalk and cut with fabric scissors!

I then iron out all my pieces. I usually don’t put any water in my iron as we have really hard water here and using the steamer on it just gets it clogged with limescale and then that gets fired out all over stuff, so I have a nice thin duster that I always use – I soak it in cold water from the tap and wring it out and lay it over the fabric and give it a quick once over with the hot iron. I then take the duster off and go over with the iron again. It works a treat. I always iron both sides of my fabric – but if you are using a fabric that might not cope too well with this – then don’t!
Once ironed I pin up my hems for the back piece. I usually do half inch – fold once – iron, fold again, iron again and pin. I then also pin up my front pieces right sides facing ready to sew together. (Don’t forget that I am making two cushions here so there are four back pieces but if you are just making one then you will just have two!)

Next it is time to sew the hems for the back pieces. I usually line mine up to the 15 (5/8) mark on my sewing machine seam guide as this is the perfect width. Then I put them to one side for later.
Then I sew up my front pieces having measured and put a line onto the back of the fabric and ironed a crease down it to be sure I am following a straight line with that extra half inch. Once done I press the seam flat front and back and then I am ready to pin on the trim I have chosen ready to hand sew it on.
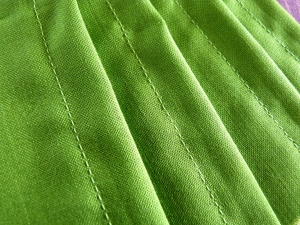
I decided on this lovely pale duck egg blue colour crochet lace ribbon by Tilda and picked a pale blue thread that wouldn’t show up to delicately sew it on – making sure I did stitches along each edge and the middle at regular intervals to make sure there were no bits that were unsecured and could get caught on things. I sat and watched some TV while I did this. You may choose to continue to sit at your designated sewing table, you may wish to do it sitting in bed. You might wish you hadn’t started but once it is done you will be pleased.

So now that the front and back pieces have been all sewn up ready, it is time to pin them together right sides facing. I tend to check the hems of my back pieces to see which one looks the neatest and lay the best one down first as this will be the one you will see when it is finished.
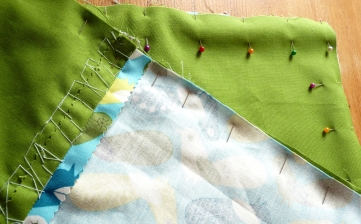
I then sew all the way round with a straight stitch – make sure the stitch length isn’t too small or your fabric will pucker, too long and you might get gaps in your seam which nobody wants. Make sure you backstitch at the end to keep the seam secure. I often go for the seam allowance measurement 20 (8/8) or 15 (5/8) on my sewing machine guide, for this one I went with 15. Once the seam is sewn I then do a zig-zag stitch down each edge stopping just short of the corners, securing each end with some straight stitch backstitch. This is to strengthen the seam, it is called serging. If you have a nice fancy machine like an overlocker you can overlock the edge, but if you are like me and don’t have all mod cons, then a zig-zag is fine. I then use pinking shears to trim the corners off – make sure you don’t cut through your stitches or you will be swearing and probably crying (if by some chance you do this, then you will need to re-sew.) Then trim away the excess fabric with the pinking shears to further protect the fabric as pinked edges fray less.

Next the iron comes out again and I press it all while it is still inside out, and then turn it the right way out making sure I poke the corners out well so they look properly pointy and iron again. You will no doubt get bits of fabric fluff all over the place from the trimmed edges so use a good lint roller to get it off and voilà! You’re done – ready to put your cushion pad in and start doing cushion type things with it!

I do enjoy it when it’s all done and I see the finished article, I like it when I know I’ve picked some good combinations of patterns, solids and embellishments and it all comes together to be something rather nice! So why not give it a go!
So the end result is now in my Etsy shop here. (Both of them.)


